
Pool
How To Build A Pool Table (DIY Pool Table Guide for Players)
introduction
Are you a pool enthusiast looking to add a personal touch to your game room? Building your own pool table can be a rewarding project, allowing you to customize it to your preferences and save some money in the process. In this comprehensive guide, we’ll explore the ins and outs of DIY pool table construction, from understanding what a DIY pool table entails to the step-by-step process of making one yourself.
What is a DIY Pool Table?
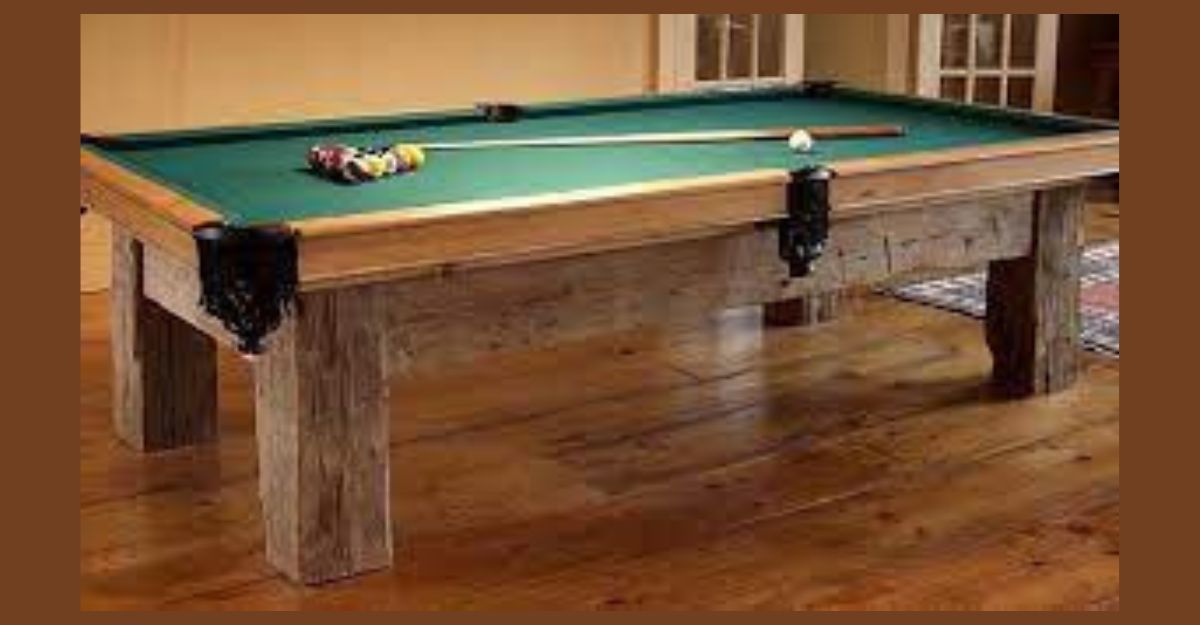
A DIY pool table is a homemade version of the standard pool table found in bars and game rooms. While professional pool tables can be expensive, building one yourself offers the opportunity to create a customized table at a fraction of the cost. DIY pool tables can be made from a variety of materials, including wood, slate, and felt, and can be tailored to fit your space and style preferences.
How to Make a DIY Pool Table?
Building a DIY pool table requires careful planning, precise measurements, and the right materials. Here’s a basic overview of the process:
- Gather Materials: Before you begin, gather all the necessary materials, including wood for the frame, slate for the playing surface, felt for the table covering, and any additional accessories you may want, such as pockets and railings.
- Construct the Frame: Start by building the frame of the pool table using sturdy wood. Ensure that the frame is level and sturdy to provide a stable base for the playing surface.
- Install the Slate: Once the frame is complete, carefully install the slate playing surface. Slate is preferred for its durability and smooth playing surface, providing an optimal experience for players.
- Cover with Felt: After the slate is in place, cover it with felt to create the playing surface. Use a high-quality pool table felt for optimal performance and longevity.
- Add Accessories: Finally, add any additional accessories, such as pockets, railings, and leveling feet, to complete your DIY pool table.
LSI Keywords Integration:
For those seeking more specific guidance, there are resources available online, including build-a-pool-table plans for free, free pool table plans in PDF format, and pool table build kits to simplify the process. Additionally, tutorials and guides on how to build a pool table in PDF format can provide detailed instructions and tips for success. For those on a budget, there are options for cheap DIY pool tables that still offer quality gameplay.
FAQs:
What materials make a pool table?
Pool tables are typically made from a combination of wood, slate, and felt. The frame is constructed from sturdy wood, while the playing surface is made from slate for its smoothness and durability. The surface is covered with felt to provide the ideal playing surface for pool balls.
How is a pool table built?
Building a pool table involves constructing a sturdy frame, installing a slate playing surface, covering it with felt, and adding accessories such as pockets and railings.
What tools do you need to build a pool table?
Common tools needed to build a pool table include a saw, drill, screws, level, measuring tape, and staple gun for attaching the felt.
How do you make a free play pool table?
To make a free play pool table, you can follow similar steps to building a standard pool table but omit the coin-operated mechanisms typically found in commercial pool tables. This allows for casual, free play among friends and family without the need for coins or tokens.
In conclusion, building a DIY pool table can be a rewarding project for players looking to add a personal touch to their game room. With careful planning and the right materials, you can create a customized pool table that provides years of enjoyment for you and your fellow players.
Introduction
The game of 8-ball pool is an engaging and strategic pastime enjoyed by enthusiasts of all skill levels around the globe. Among the essential skills every player must possess is the ability to rack the balls effectively at the beginning of each game. A properly arranged rack sets the stage for a fair and competitive match. In this guide, we’ll delve into the intricacies of 8-ball pool rack setups, exploring what they are, the rules governing them, and how to execute a professional rack setup in six simple steps.
What Is an 8-Ball Pool Rack?
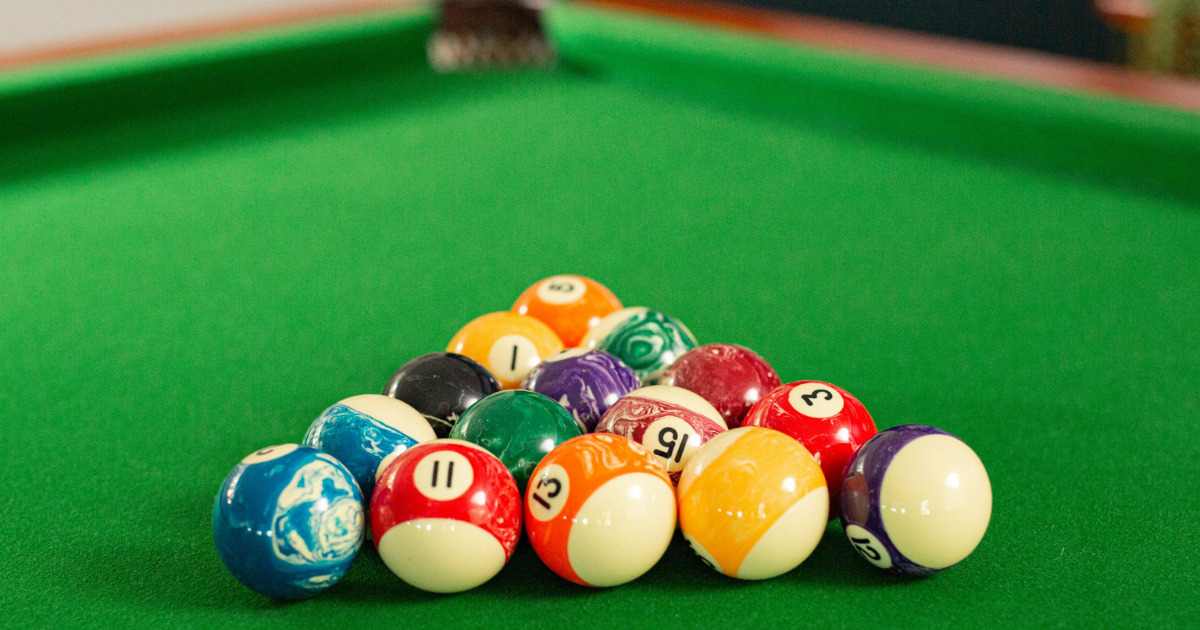
Before diving into the specifics of how to rack in 8-ball professionally, it’s important to understand what exactly an 8-ball pool rack is. In simple terms, the rack is the triangular frame used to organize the fifteen balls (one cue ball and fifteen object balls) at the beginning of a game. The purpose of the rack is to create a tight formation that allows for a fair and even distribution of balls across the table.
What Are Racking Rules for 8-Ball?
Racking rules vary slightly depending on the specific version of 8-ball being played and the governing body or league. However, some general guidelines apply universally. The key principles include:
- The Apex Ball: The 8-ball should be placed at the center of the rack, with the apex (front) ball of the triangle directly on the foot spot.
- Alternating Ball Types: The balls should be racked in a specific pattern, with one solid (numbered) ball followed by one striped (numbered) ball, and so on, forming a solid-stripe-solid-stripe pattern.
- Random Placement: Within the solid and striped groups, the specific order of the balls is not important, as long as the alternating pattern is maintained.
- The Back Corners: The corners of the triangle rack should contain one solid and one striped ball.
- Tight Formation: The balls should be arranged tightly within the rack, with minimal gaps between them to prevent movement during the break.
6 Steps to Set Up in 8-Ball Like a Pro
Now, let’s outline a step-by-step process to set up the 8-ball rack professionally:
Step 1: Prepare the Table
Before beginning the racking process, ensure that the pool table surface is clean and free of debris. Brush the table with a clean cloth or use a table brush to remove any dust or chalk residue.
Step 2: Position the Rack
Place the triangular rack at the foot of the table, with the apex ball positioned directly over the foot spot. Ensure that the rack is centered and aligned with the table’s head string.
Step 3: Arrange the Balls
Begin by placing the 1-ball (solid) at the front of the rack, followed by the 9-ball (striped) directly behind it. Continue alternating between solid and striped balls, working your way towards the back corners of the rack.
Step 4: Fill the Corners
Place one solid and one striped ball in each of the back corners of the rack. This arrangement helps distribute the balls evenly across the table and minimizes the likelihood of clusters forming during the break.
Step 5: Tighten the Formation
Once all fifteen balls are in place, gently press down on the top of the rack to compress the balls and create a tight formation. Ensure that there are no gaps between the balls and that they are snugly packed within the rack.
Step 6: Remove the Rack
With the balls securely positioned, carefully lift the rack off the table, being mindful not to disturb the arrangement of the balls. The rack should lift cleanly away, leaving the balls in a neat triangular formation.
How to Rack 8-Ball?
Racking in 8-ball is a fundamental skill that every player should master. By following the proper racking guidelines and techniques, you can ensure a fair and consistent start to each game, setting the stage for exciting competition on the pool table.
FAQs
Q: How do you professionally rack an 8-ball?
A: To rack an 8-ball professionally, follow the standard racking rules, ensuring that the balls are arranged in a tight triangle with the apex ball over the foot spot.
Q: What is the proper 8-ball layout?
A: The proper 8-ball layout involves arranging the balls in a tight triangle formation, with the apex ball (8-ball) at the center and one solid and one striped ball in each back corner.
Q: What are the rules for racking in APA pool?
A: In APA (American Poolplayers Association) pool, the racking rules are similar to standard 8-ball rules, with specific guidelines regarding ball placement and tightness of the rack.
Q: How do you set up an 8-ball?
A: To set up an 8-ball game, follow the standard racking procedures outlined in this guide, ensuring that the balls are arranged in a tight triangle with the 8-ball at the center.
In conclusion, mastering the art of racking in 8-ball is essential for any serious pool player. By understanding the principles of proper racking and following the step-by-step techniques outlined in this guide, you can ensure a fair and competitive start to every game. With practice and attention to detail, you’ll be racking like a pro in no time.
Introduction
Welcome to the thrilling world of 9-ball pool, where precision, strategy, and finesse merge into an electrifying game. Whether you’re a seasoned player looking to refine your skills or a beginner eager to learn the ropes, understanding the rules and proper setup of 9-ball is paramount to your success on the felt. In this comprehensive guide, we’ll delve into the nuances of 9-ball pool, covering everything from the rules of the game to expert tips on racking like a pro.
9-Ball Pool Rules
Before we delve into the intricacies of racking, let’s first familiarize ourselves with the fundamental rules of 9-ball pool. Unlike its counterpart, 8-ball, which involves pocketing balls in numerical order, 9-ball requires players to pocket the balls in ascending numerical order. The game is typically played with nine balls numbered one through nine, with the nine-ball serving as the game-winning shot.
Each player aims to pocket the balls in sequence, with the cue ball striking the lowest numbered ball on the table first. If a player successfully pockets the lowest numbered ball, they continue shooting until they miss or foul. Fouls in 9-ball pool can occur if a player fails to make contact with the lowest numbered ball, pockets the cue ball, or commits other infractions outlined in the official rules.
How To Rack 9-Ball Properly
Properly racking the balls is essential for ensuring a fair and consistent game of 9-ball pool. Follow these five key factors for a flawless 9-ball setup:
- Use a Quality Rack: Invest in a sturdy rack specifically designed for 9-ball pool. A precision-engineered rack ensures that the balls are tightly packed, minimizing gaps and inconsistencies.
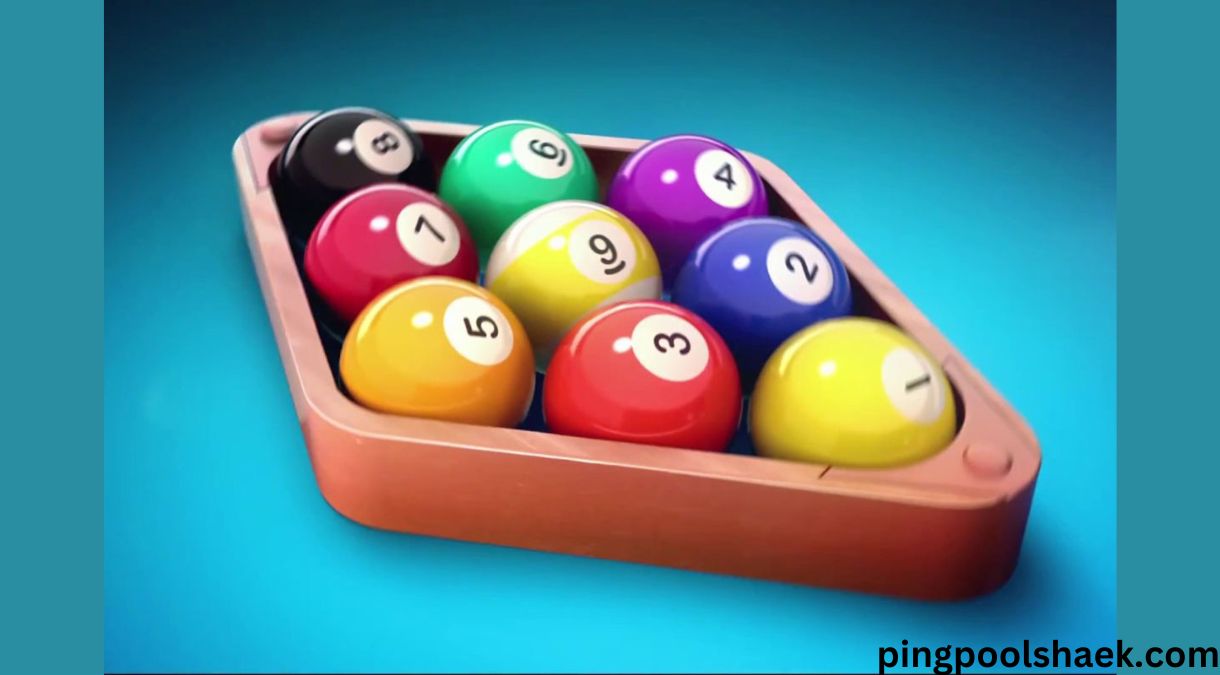
- Position the One-Ball at the Front: Place the one-ball at the front of the rack, with the nine-ball in the center. This setup facilitates a smooth break, allowing the cue ball to strike the one-ball head-on.
- Alternate High and Low Balls: Arrange the remaining balls in the rack in an alternating pattern of high and low-numbered balls. This distribution promotes even dispersion upon breaking, reducing the likelihood of clustered balls.
- Center the Rack: Ensure that the rack is centered on the table, with the apex aligned precisely with the foot spot. Proper alignment maximizes the effectiveness of the break and minimizes the risk of balls jumping off the table.
- Apply Firm Pressure: Once the balls are properly positioned in the rack, apply firm pressure to secure them in place. Press down on the top of the rack while lifting slightly to create tension, then carefully remove the rack without disturbing the balls.
By adhering to these five factors, you’ll create the optimal conditions for a powerful and controlled break, setting the stage for an exhilarating game of 9-ball pool.
Frequently Asked Questions
- What is the correct way to rack for 9-ball?
The correct way to rack for 9-ball involves positioning the one-ball at the front of the rack, alternating high and low balls, centering the rack on the table, and applying firm pressure to secure the balls in place. - How do you rack pool balls like a pro?
Racking pool balls like a pro requires attention to detail and precision. Use a quality rack, position the balls correctly, and apply firm pressure to ensure a tight and consistent rack every time. - How can I be a better 9-ball player?
To improve your skills in 9-ball pool, focus on mastering the fundamentals, such as aiming, positioning, and cue ball control. Practice regularly, study advanced techniques, and learn from experienced players to enhance your gameplay. - How do you place 9 balls?
When placing the 9 balls for a game of 9-ball pool, arrange them in numerical order, with the one-ball at the front of the rack and the nine-ball in the center. Alternate high and low balls to promote an even break.
Conclusion
Mastering the art of racking and understanding the rules of 9-ball pool are essential steps on the path to becoming a skilled player. By following the guidelines outlined in this guide and incorporating them into your practice routine, you’ll elevate your game and enjoy greater success on the felt. So gather your cue, set up the balls, and prepare for an exhilarating journey into the world of 9-ball pool.
Bumper pool is a captivating variation of traditional pool that offers a unique and dynamic gaming experience. Whether you’re a seasoned pool player looking to try something new or a complete novice eager to dive into the world of cue sports, learning how to play bumper pool can be both enjoyable and rewarding. In this guide, we’ll explore the fundamentals of bumper pool, including essential rules and strategies to help beginners get started on the right track.
Understanding Bumper Pool: An Overview
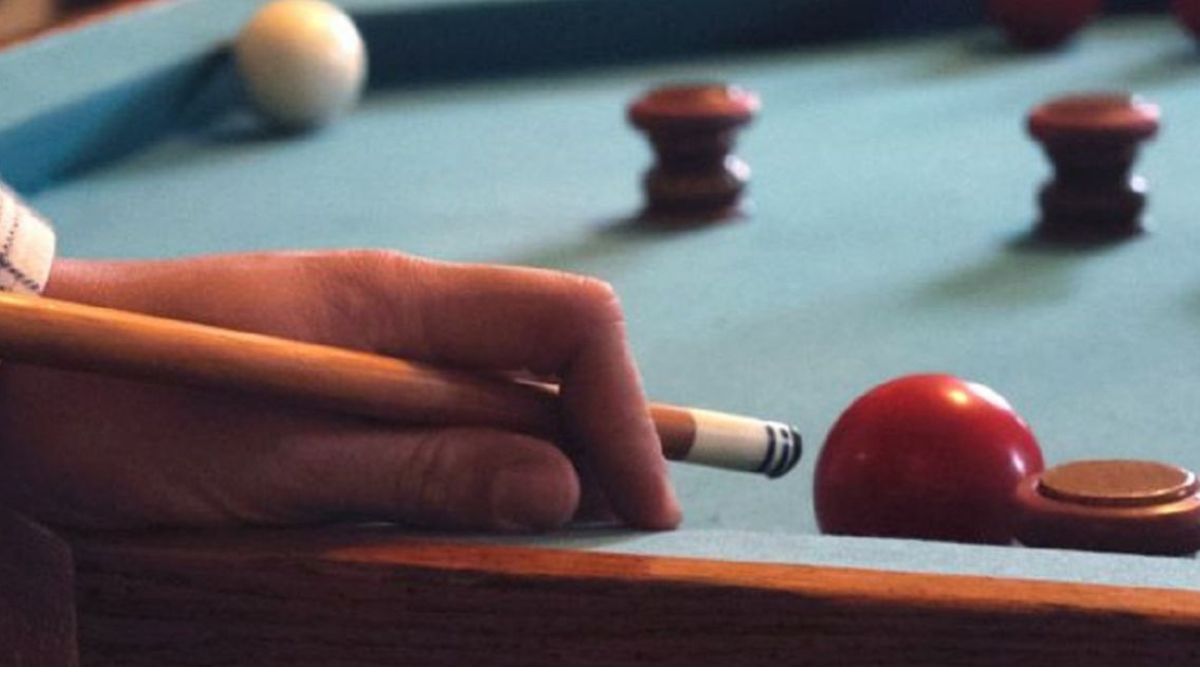
Bumper pool is played on a smaller rectangular table, typically with dimensions ranging from 4.5 feet by 3 feet to 4.5 feet by 2.5 feet. Unlike traditional pool tables, bumper pool tables feature obstacles known as bumpers or cushions positioned in the center of the playing surface. These bumpers serve as barriers and strategic aids during gameplay, adding an element of complexity and excitement to the game.
The Objective of Bumper Pool
The objective of bumper pool is similar to that of traditional pool: to pocket all of your assigned balls (either solids or stripes) before your opponent does the same with their respective balls. However, in bumper pool, players must navigate around the bumpers strategically to pocket their balls in designated corner pockets. The player who successfully pockets all of their balls first and sinks the final ball into the designated pocket wins the game.
Essential Bumper Pool Rules for Beginners
1. Determining Player Order
- To determine who goes first, each player should simultaneously shoot their cue ball from behind the line located at the head of the table. The player whose cue ball comes closest to the opposite end rail without touching it gets to break first.
2. The Break Shot
- The player who wins the opening shot has the privilege of breaking the rack. The cue ball must be struck from behind the head string (the line parallel to the short rails). During the break shot, the player aims to pocket one of their assigned balls while avoiding sinking the opponent’s balls or scratching (pocketing the cue ball).
3. Legal Shots
- Players must always strike the cue ball with the cue tip and aim to hit one of their assigned balls first. Failure to do so results in a foul, allowing the opposing player to place the cue ball anywhere on the table.
4. Pocketing Balls
- Each player must pocket their assigned balls into the designated corner pockets on their respective ends of the table. A player’s turn continues until they fail to pocket one of their balls or commit a foul.
5. Fouls and Penalties
- Fouls in bumper pool include pocketing the cue ball, striking the opponent’s assigned balls first, failing to hit any balls, and scratching on the break. When a foul occurs, the opposing player gets to place the cue ball anywhere on the table and take their turn.
6. Ending the Game
- The game ends when one player successfully pockets all of their assigned balls and sinks the final ball into the designated pocket without committing a foul. The player who achieves this wins the game.
7. Stalemate Resolution
- If the game reaches a stalemate where neither player can pocket their remaining balls, the game ends in a draw, and a rematch can be initiated.
Strategies for Success in Bumper Pool
1. Study Angles and Deflection
- Understanding how the cue ball reacts to different angles and deflection off the bumpers is crucial for mastering bumper pool. Practice shots from various positions to develop a feel for the table’s geometry.
2. Plan Ahead
- Anticipate your next moves and consider the positioning of your opponent’s balls when planning your shots. Aim to set up favorable angles for your subsequent shots while simultaneously disrupting your opponent’s strategy.
3. Use Bumpers to Your Advantage
- The bumpers serve as both obstacles and strategic aids. Utilize them to bounce the cue ball into favorable positions or to block your opponent’s shots.
4. Control Cue Ball Speed
- Mastering control over the cue ball’s speed is essential for precision shots in bumper pool. Practice adjusting your shot strength to achieve the desired outcome, whether it’s a soft touch for precise positioning or a powerful stroke for pocketing distant balls.
5. Practice Patience and Focus
- Bumper pool requires a combination of skill, strategy, and concentration. Stay patient, focus on each shot, and avoid rushing decisions that could lead to costly mistakes.
Frequently Asked Questions (FAQs)
What are the rules for playing bumper pool?
- The rules for playing bumper pool involve determining player order, executing legal shots, pocketing assigned balls into designated pockets, avoiding fouls, and ultimately winning the game by pocketing all assigned balls.
How do you play pool rules for beginners?
- For beginners, it’s essential to start with the basics, including understanding the rules of the game, practicing fundamental shots such as straight shots and bank shots, and gradually building skills through consistent practice and gameplay.
How do you play pool for the first time?
- When playing pool for the first time, focus on mastering basic techniques such as grip, stance, and cue ball control. Start with simple shots and gradually progress to more advanced strategies as you gain experience and confidence.
What is the point of bumper pool?
- The point of bumper pool is to pocket all of your assigned balls into designated corner pockets on the table while strategically maneuvering around obstacles (bumpers) and outmaneuvering your opponent. It offers a challenging and dynamic alternative to traditional pool games.
Conclusion
Bumper pool presents an exciting twist on traditional pool, offering players a blend of strategy, skill, and excitement. By familiarizing yourself with the rules and strategies outlined in this guide and dedicating time to practice, you can develop the proficiency and confidence needed to excel in this captivating cue sport. So, gather your cue stick, line up your shots, and dive into the exhilarating world of bumper pool!

Tips for Rejuvenating: https://me-encantas.com/2020/03/23/tips-para-rejuvenecer

Netflix Stranger Things 4 Primer Teaser: https://gadgetzona.net/2020/02/netflix-stranger-things-4-primer-teaser

UPC 810043986496: Your Guide to a Powerful Pre-Workout Supplement

UPC: 37431881809 Parts – Understanding Product Identification and Applications

Newznav.com Crypto Archives Page: Your Gateway to Navigating Cryptocurrency

Divya Agarwal HealthSherpa: Pioneering Holistic Health and Wellness

Amber’ley Della-Calce Jorden Divorce: A Deep Dive into the High-Profile Split

23455 Breaking Waves Court: Beachfront Bliss in Millville, DE

Kingdom 801 RAW: A Turning Point in the Saga

Understanding CoopPlayerMaxNum: The Key to Balanced Cooperative Gaming
-

 Blog8 months ago
ping-pong-paddle-for-defense
-
Blog8 months ago
Unveiling the Top 10 Female Ping Pong Players of All Time
-
Ping Pong8 months ago
Improving Reflexes in Table Tennis: Exercises and Techniques
-
Blog8 months ago
How to Play a Forehand Loop in Ping Pong – An Important Step to Be a Pro
-
Blog8 months ago
BENEFITS OF PLAYING POOL – THE SPORT CAN HELP YOU MORE THAN YOU THINK
-
Blog8 months ago
Common Ping Pong Injuries and How to Avoid Them
-
Equipment Reviews7 months ago
Refelting a Pool Table: 8 Steps to Install New Felt
-
Blog8 months ago
What is The Pool? Some Kind of Pool That Pool Lovers Have to Know


